Advanced Computer Drafting: Second Year Work
This is my second year of computer drafting.
Final Exam: Keychain

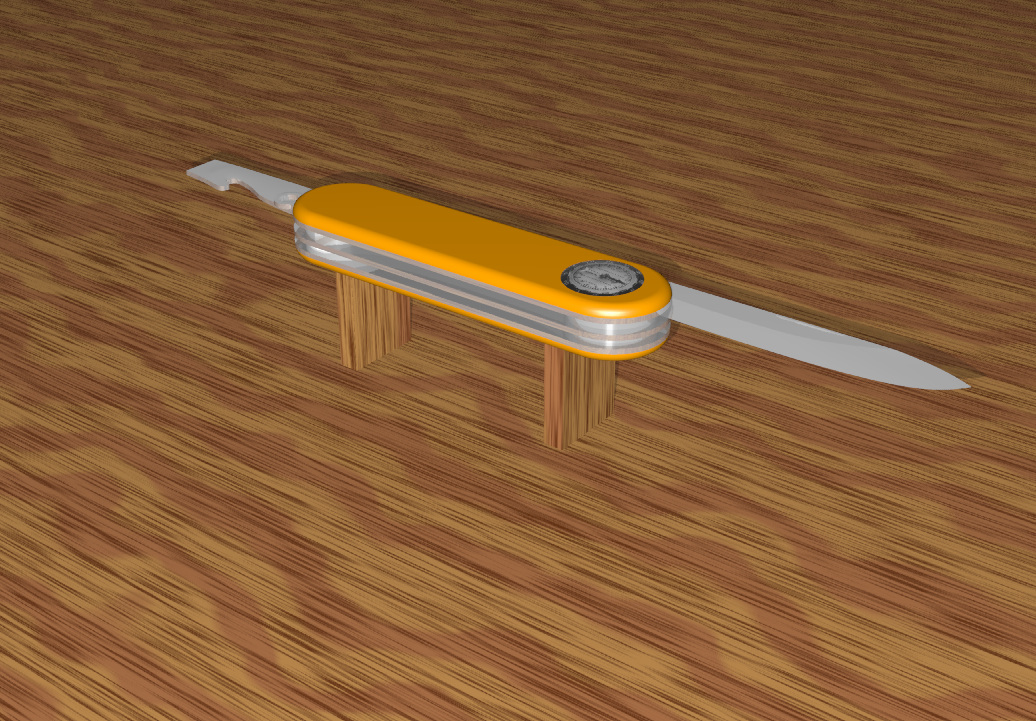
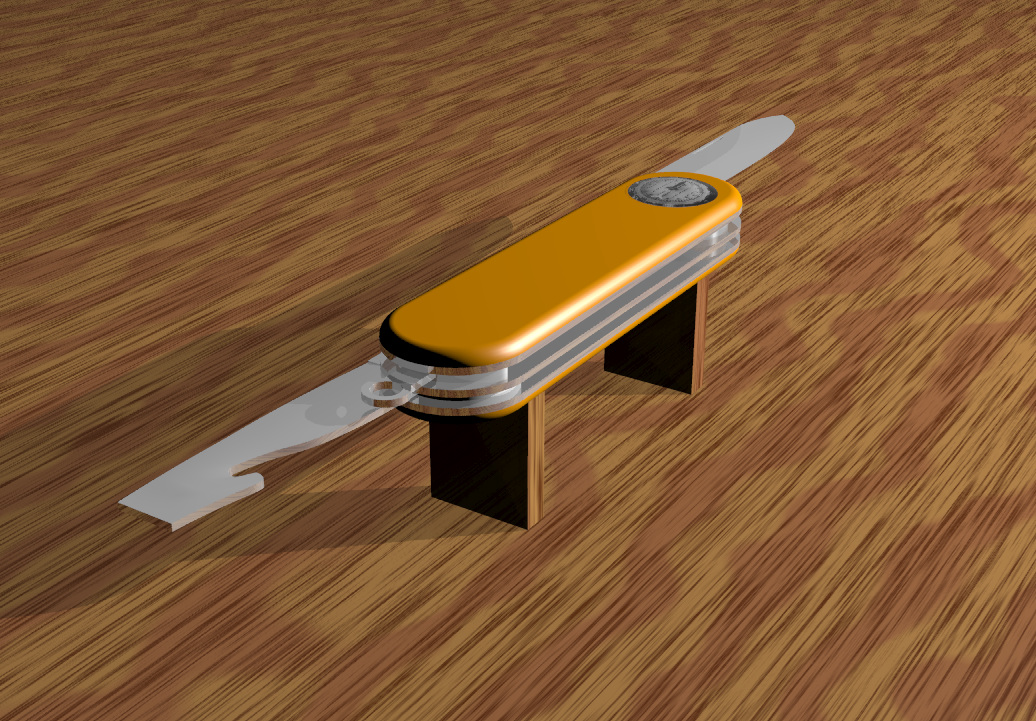
My keychain that I designed isn't just for show or looks. It is a utility multitool that you can attach to a set of keys or carry around in your pocket. It has a small blade for cutting tasks on one side and a Flathead screwdriver with an integrated can opener on the other side. They fold in and out for easy handling whenever you need them. In addition to this it has a compass located on the top of the multitool. The metal parts of the tool are made of 440C Stainless Steel, one of the strongest and most durable steels on the market.
The top and bottom are made of high quality polymer textured orange to ensure that you don't lose it and it will never break.
Design Process
If I had more time to work on my project i would have added extra tools such as a Phillips Head screwdriver and other tools. I also would have increased the complexity of the animation by making the tools perform an action like unscrewing something or cutting a piece of wood.
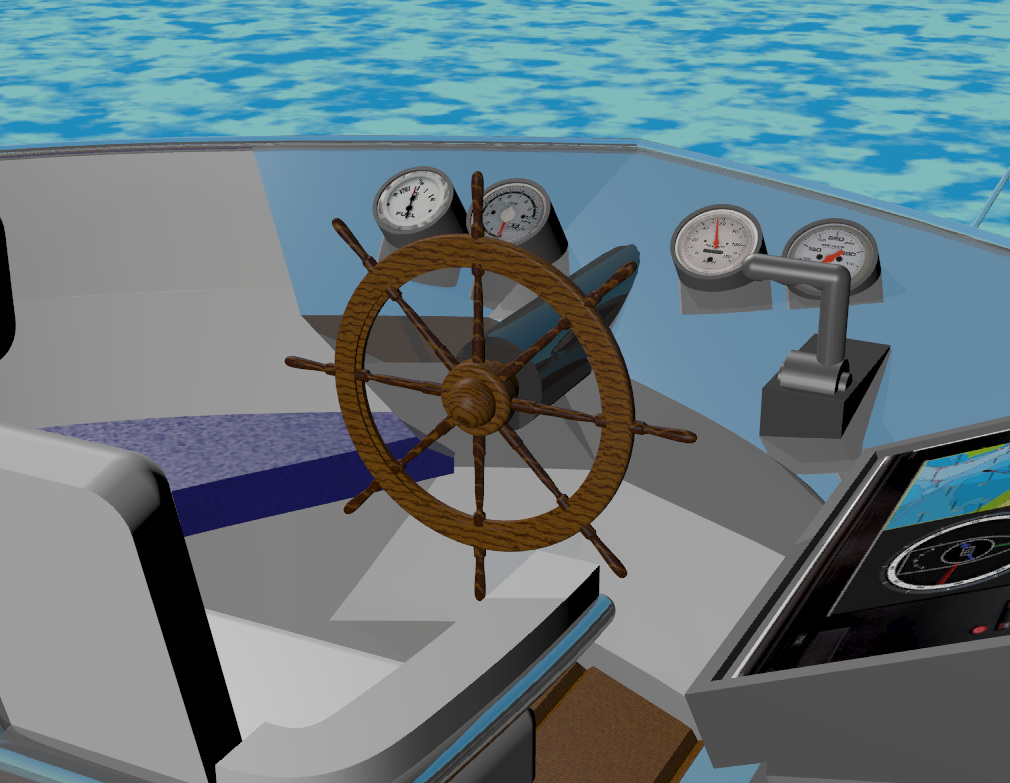
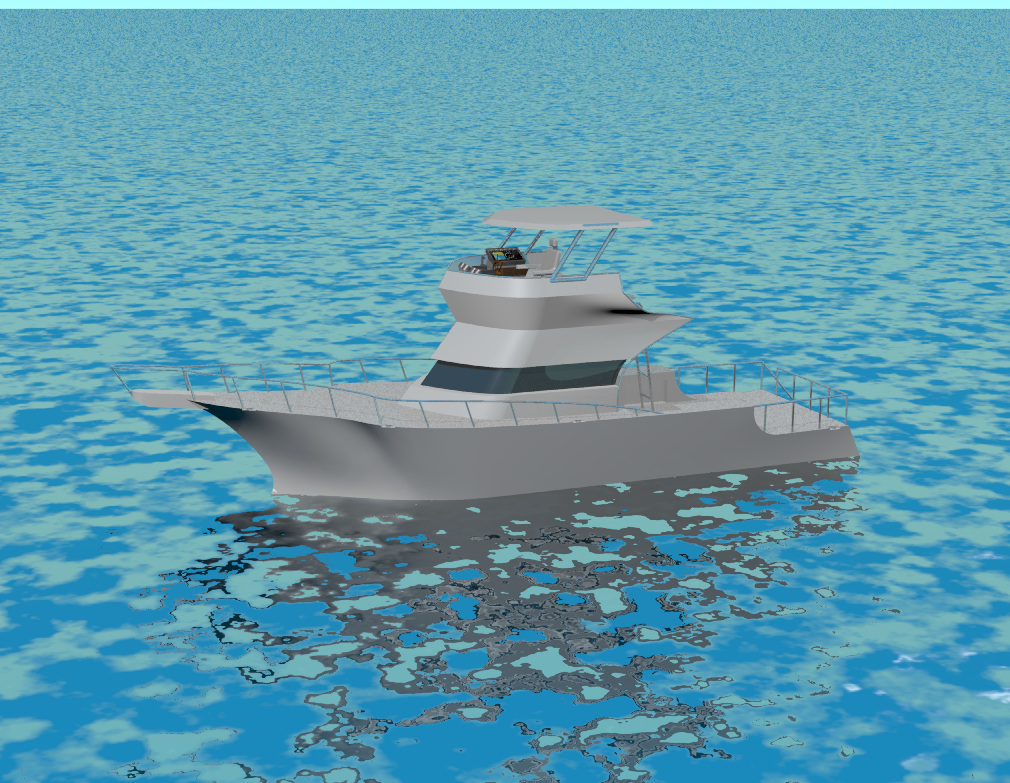
Private Yacht

This is a custom 40-foot yacht. It comes complete with a bow and aft deck for lounging. Positioned over the center cabin is an open pilothouse for controlling the yacht.
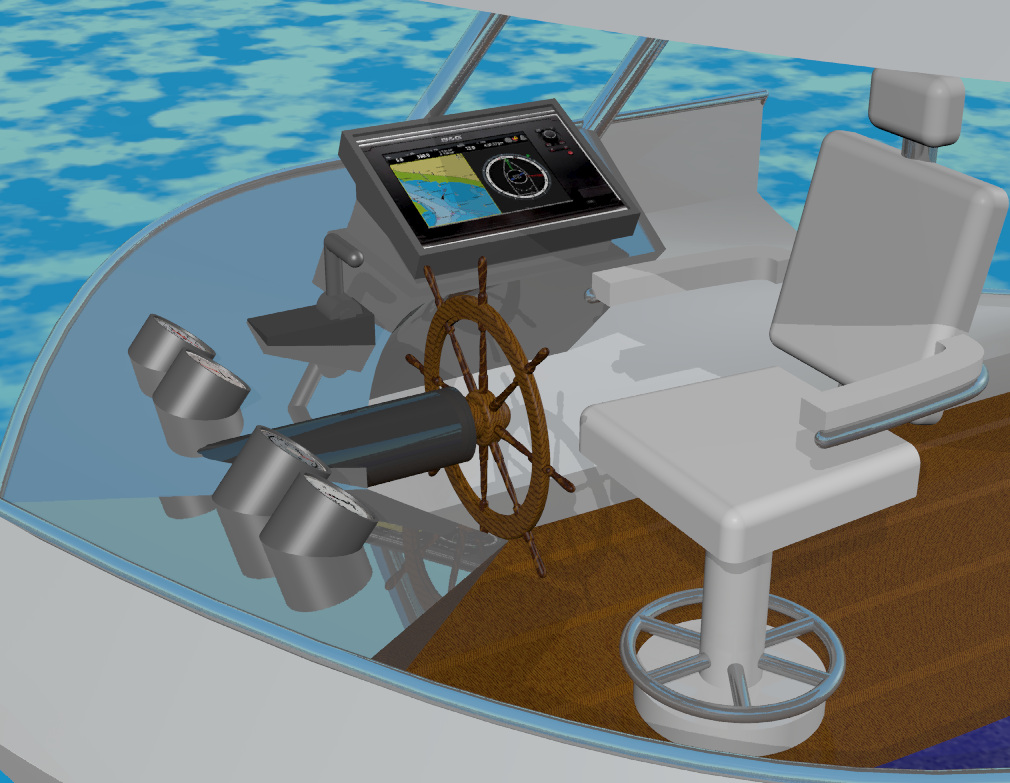
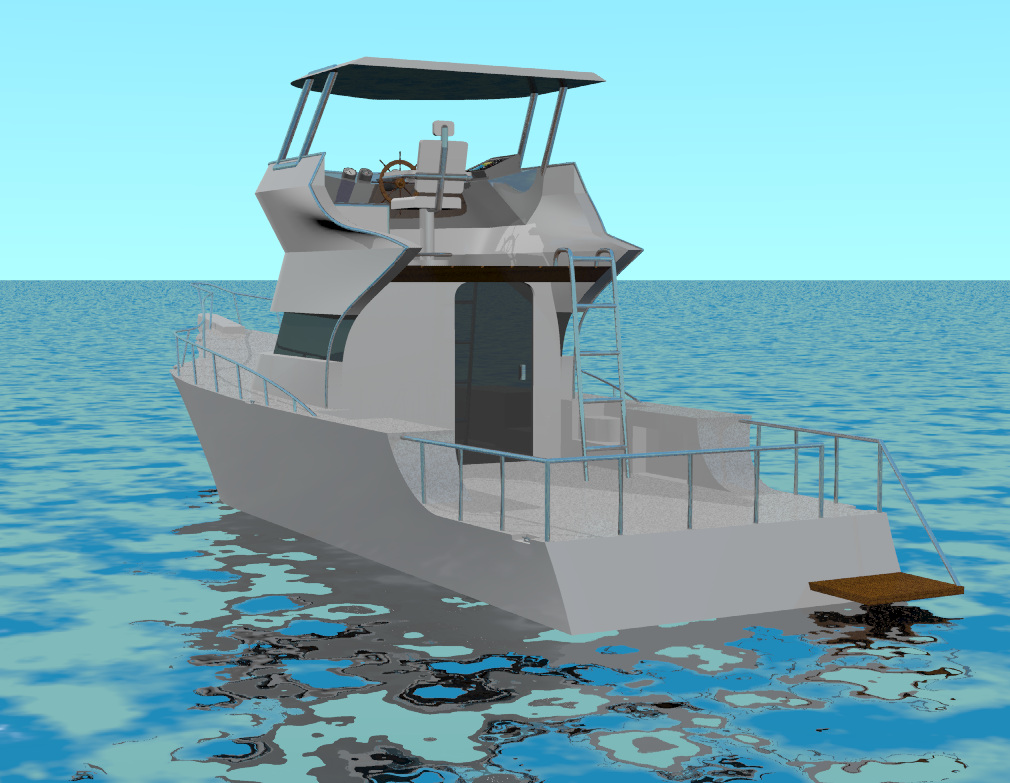
The pilot house comes complete with an old style wooden helm and a comfortable captains chair. In front of the helm are various gauges and a throttle. To the right of the captains chair is a multi-functional Heads Up Display. The HUD acts as a GPS, compass, and monitors the performance of the boat all with a few clicks on its touch screen.

Design Process:
I started the project by designing the hull with a Sweep 2 command. This allowed me to create a complex looking surface as the hull. Then by filling in the top i made a floor to make it solid. Using a pipe command was all it took to make a railing so boaters don't fall into the water. Once i had the main hull complete i worked on the main central cabin. I was originally going to design an interior for the boat but dropping this idea allowed me to concentrate most of the detail in the pilothouse that sits on the top of the cabin.
Rendering Process
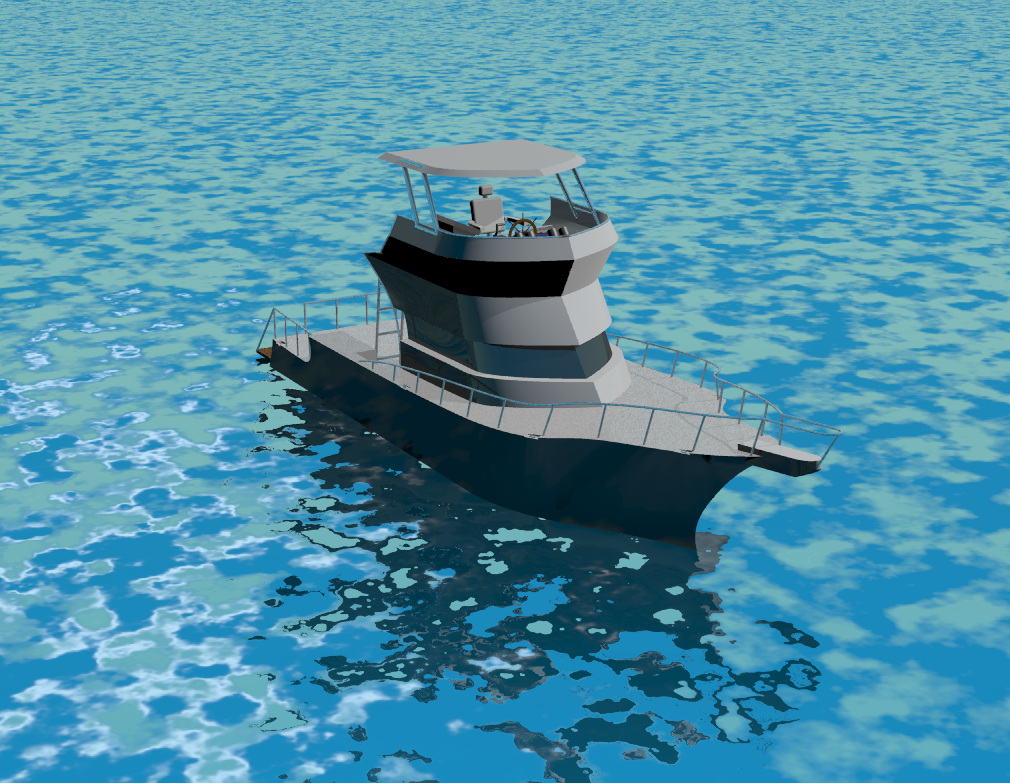
The hull began as a light gray material with some reflective qualities. This was designed to look like fiberglass although it created a curious visual when viewed from certain angle as demonstrated by the bottom right photo in the gallery. That wasn't supposed to happen but it did look cool in the final renderings. Most of the other surface were copied from earlier drawings and slightly modified for use on my boat. Most of the metal reflective surfaces were already designed when i started the boat so i was able to copy them without having to start from scratch. For the helm i used an existing wood material in the Flamingo inventory which i modified by changing the color and reflectivity of the individual rings in the wood. To make the helm look better i did this with two different wood patterns so the spokes were a darker color and the main ring of the helm was darker. The water is merely one of the Flamingo water materials but i played with the lighting to make it look more realistic. One of my best renderings was the lower left hand photo in the gallery. I used the same water as the other renderings but i angled the view down to give a longer shot. To get the background of the sunset i added a background image of a sunset over land. The rendering gives the impression that the yacht is sitting peacefully at anchor with a beautiful sunset in the background.
Rube Golberg Machine
This project is about creating a Rube Golberg machine using Bongo. My machine starts with a stack of dominoes that fall and push a ball across the table. The ball stops and is picked up by a miniature crane that drops it in a counterweight scale. The opposing end of the scale tips up and triggers a catapult to fire a ball at a target which hits with a bulls-eye. As the bulls-eye gets hit it activates a ball to roll out from a hidden chamber and turn on a button. The button raises a slide that says RUBE GOLBERG on it.
Final Design
My final design included the extra movements that were mandated by my project parameters.
Original Design
This design was my original idea and it was deemed not long enough by my Computer Drafting teacher. The design itself was sound so I added on to it with the RUBE GOLBERG sliding wall.
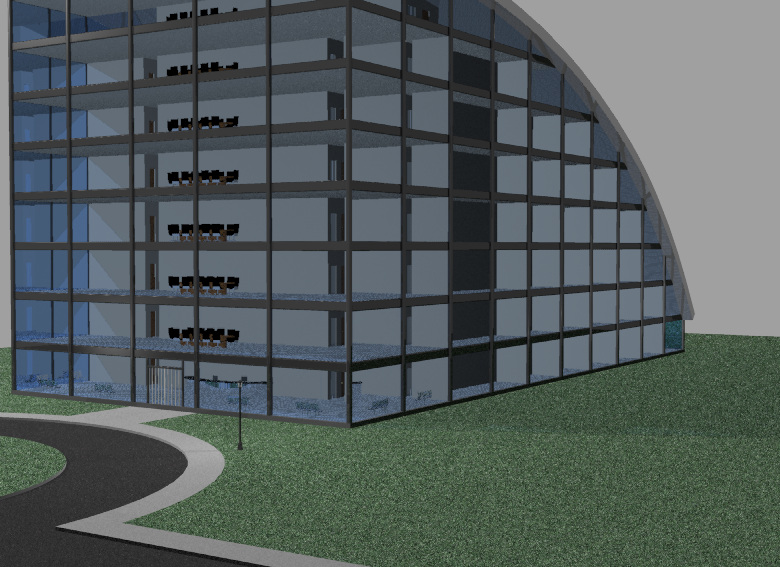
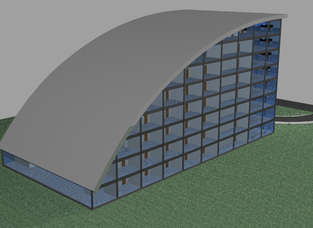
Office Building
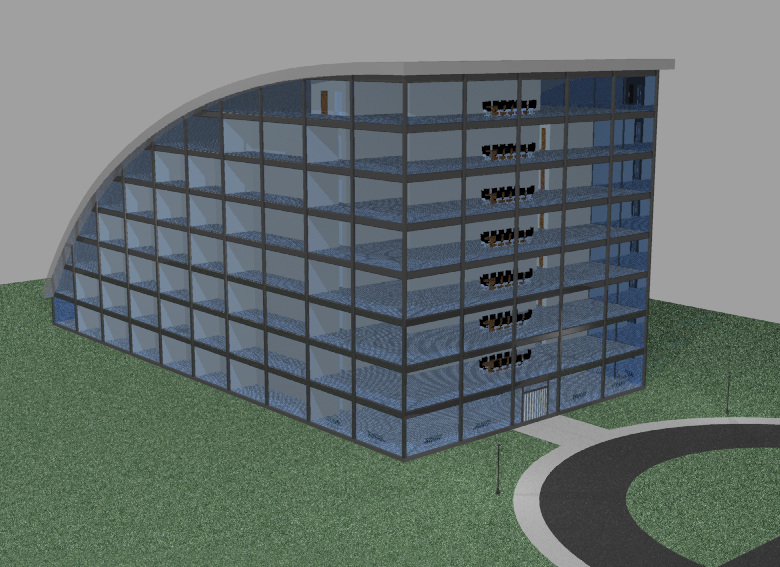
As my first project of the year i had to design an office building. The building had to be functional for businesses and other applications. The building itself is an outer steel frame style building with blue reflective windows. It is eight stories tall with many rooms for offices and conference tables. Due to the sloped roof the floors get smaller the higher you go up. The last floor is devoted entirely to one large conference room designed for the headquarters of a large corporate business. Each floor is connected by two elevators and two emergency stairwells.
Alternate View of the Building
Back of the Building
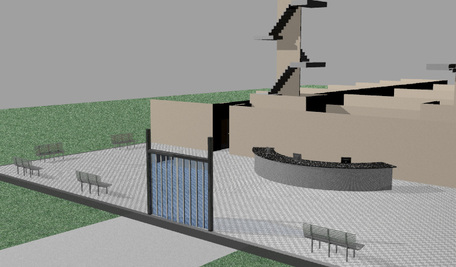
Interior - Lobby and Interior Rooms
Interior Lobby
The Design Process
Usually i don't tell how i designed the building or problems that i ran into while drawing but this building was special because it was the first drawing that had ever been so large that it used up all of the RAM on the computer so i couldn't render it. What i did to correct this was i split the main drawing into two smaller drawings, one of the exterior and one of the interior. In the exterior drawing i deleted all of the furniture on the inside except for the conference tables in the front of the building. I kept those in the drawing because it made the drawing appear more realistic by showing some of the interior but no overloading the computer and what it had to render. For the interior part of the drawing i deleted everything all exterior walls and all but the first floor. I kept the first floor open to the air to give the viewer an example of the layout of the individual floors in the building. Once this was accomplished i rendered the two different drawings to show off the building without destroying the building.
